

Action Plans are a great way of automating tasks.
Many of the tasks that you will perform within OpenCRM will involve creating activities and linking them to the item that you are creating, whether that is a new Project, a new Company or even a new Lead. You may find that when performing these tasks you are creating similar activities a lot of the time and this is where you will find Action Plans extremely useful.
This article will teach you how to:
- Create new Action Plans
- Use those Action Plans
- Set up Conditional Action Plans
- How these work with our JotForm integration
Creating Action Plans
Action Plans can be created for all of the modules shown in the below image which shows the Action Plans section of the Settings page which is available to System Administrators.
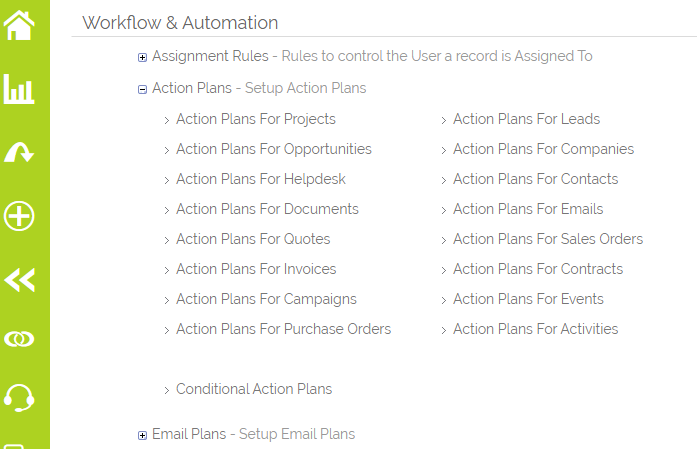
You can create an Action Plan for one of these modules by clicking the relevant link on the Settings page.
The following image shows the 'Project Action Plans' page however this is the same for all of the other modules and the only difference is which module you are able to use the saved Action Plans from as you will see shortly.

The image above shows the Projects Action Plan page with one Action Plan which contains a single activity.
When you use this Action Plan any of the Activities saved within it will be created so you need to specify the properties that the created activities will have.
- First of all, you should give your Action Plan a distinctive name so that you know which plan it refers to when you come to use it.
- You will then need to pick which date your Action Plan will use as the start time. You can pick either the Run Date(the day you select the Action Plan on a record and click save) or any date field in the module.
- For example on a Project, you might want to choose to start the Activities from the Start Date rather than the date the Project was created.
- Working from left to right select an Activity Type, Category, enter the Subject and set how long after using the Action Plan you would like the Activity to start in days, months and years. Click the plus icon next to the Subject field to add an optional Description field.
- It is possible to set the Activity to start in hours and minutes. You have two options:
- From this time: This would be the number of hours/minutes from the time on the date field you are using, for example, 2 hours from the records created time.
- On this time: You can use this to set a specific start time for the activity in hours and minutes.
- Set the Duration and Status of the Activity
- And choose who the activity will be Assigned To. The Assigned To field can be set to either a single User or a Team
- If the User option is selected there is a special user called Creator to which the Activity can be assigned to. The Creator is not the user who created the Action Plan - it is the user who uses the Action Plan itself.
The 'X' button on the right side of the Activity can also be used to delete the activity from the row it is next to, however, there must always be at least one activity linked to an Action Plan so it is not possible to remove the first row.
Any changes made to the Action Plan will not be committed until the Action Plan is saved so if you are happy with the changes you have made you can click Save or if not just click Cancel and no changes will be made to the Action Plan.
You can have as many Activities on your Action Plan as you require and as many Action Plans as you need.
Using Action Plans
In this example, we will look at how to use them with the Project module but the process is the same for every module, the only difference may be the position of the Action Plan drop-down selector.
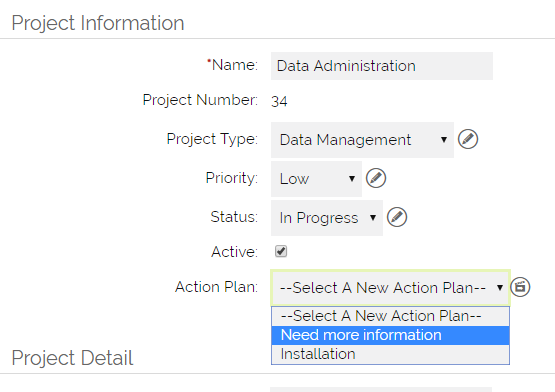
The image above shows the top of the 'New Project' page and you can see the Action Plan drop-down selector at the bottom of the first header. As you can see in the image there is no Action Plan selected by default and to use one of your Action Plans you simply need to select it from this list. When an Action Plan is selected and you click to 'Save' the project all of the activities listed in the selected Action Plan will be created.
Note: when you run an Action Plan against an Activity, the newly created Activities will be linked to the Contact, Company, and/or Related to records on that parent Activity.
Conditional Action Plans
Conditional Action Plans are triggered when a specific condition is fulfilled. There are various reasons why you might need these, for example, you might want to trigger a specific set of activities if an Opportunity of more than a certain value is created, or when Projects of a specific Type are created.
You can access set up for Conditional Action Plans from the Settings page and selecting the following option:

You will see a screen like below that shows you all the current Conditional Action Plans you have set up
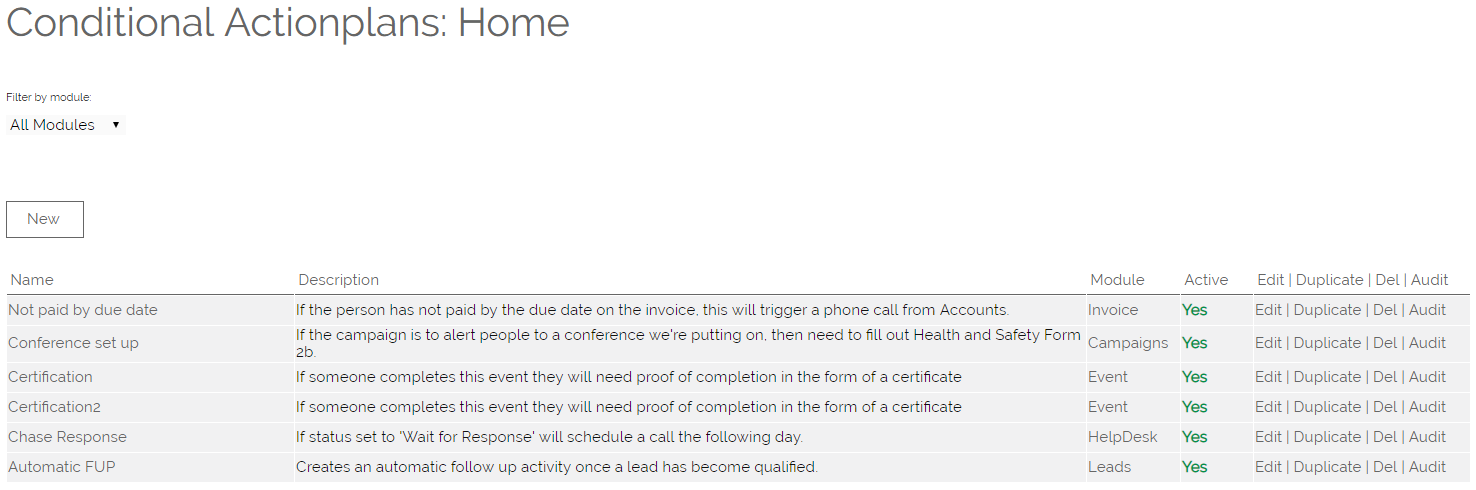
Clicking "New" will open a window where you can create a Condition that you can use to trigger an Action Plan.
Important: You need to already have the Action Plan created BEFORE setting up the condition.
This screen is made up of a number of different parts:
- Module - Select the module you wish to run the Action Plan against
- Name - Give your Conditional Action Plan a sensible name so you can find it again easily
- Description - Write up a brief description of what the Conditional Action Plan is going to be used for, you may even want to spell out the Conditions and which Action Plan you are triggering
- Active - Ticking this box will mean the Conditional Action Plan is switched on. Leaving it unticked will mean that it is not triggered--this can be good if you are still drafting or waiting for approval
- Trigger (right side of the screen) - You can choose from OnSave, OnEdit, and On Consult. These decide when the system checks to see if your record needs to run the Action Plan you've selected.
- Conditions - You can create these conditions based on any field within the module, and you have a variety of different triggers such as "Equals" which you can use to define the Condition:
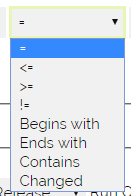
- Action Plan - Finally you can select an Action Plan from those already created in your system. You can choose to set the Action Plan to run only once or if you leave this unticked, the Action Plan will be triggered every time the record is saved, edited, or viewed.
Action Plans and Emails
When triggering an Action Plan from an Email, this will link the resulting Activity/ Activities to relevant Companies and Contacts associated with the Emaill, as well as linking the Activity back to the Email itself
Conditional Action Plans and Jotform
Generally, Conditional Action Plans will be triggered when a record is Saved. If a record has been created from an external source e.g. a Jotform submission, this effectively creates and Saves a record in OpenCRM, therefore you are able to use Conditional Action Plans based on a Jotform submission.
Need More Help?
If you have any questions, just start a Live Chat, "Click" on the Chat Icon in the lower right corner to talk with our support team.