


It is possible to change the block and field layout, adding your own blocks and customising the number of columns used for fields. This is available for Leads, Contacts, Companies, Documents, Activities, Opportunities, Quotes, Sales Orders, Invoices, Projects, Products and Contracts.
This FAQ is going to walk you through creating and using Layouts, how to set a default Layout and how to make Layouts on Opportunities and Contracts conditional.
Creating Layouts
To access the Layout creation pages from Settings:
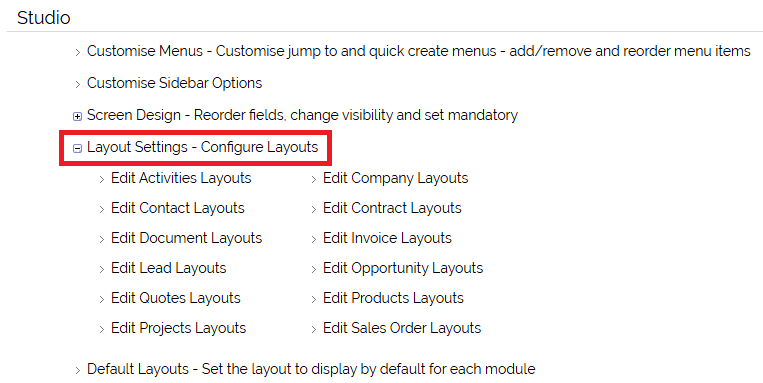
Clicking on the Edit links above will take you to:
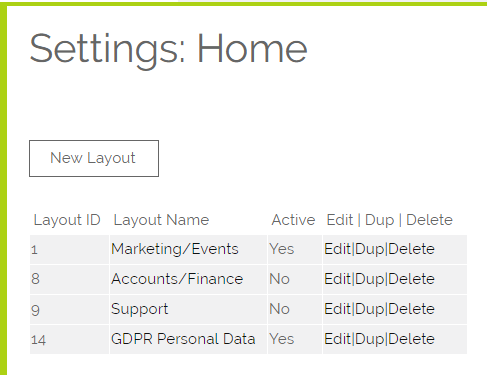
From here you can create, edit, duplicate or delete Layouts
Building a Layout
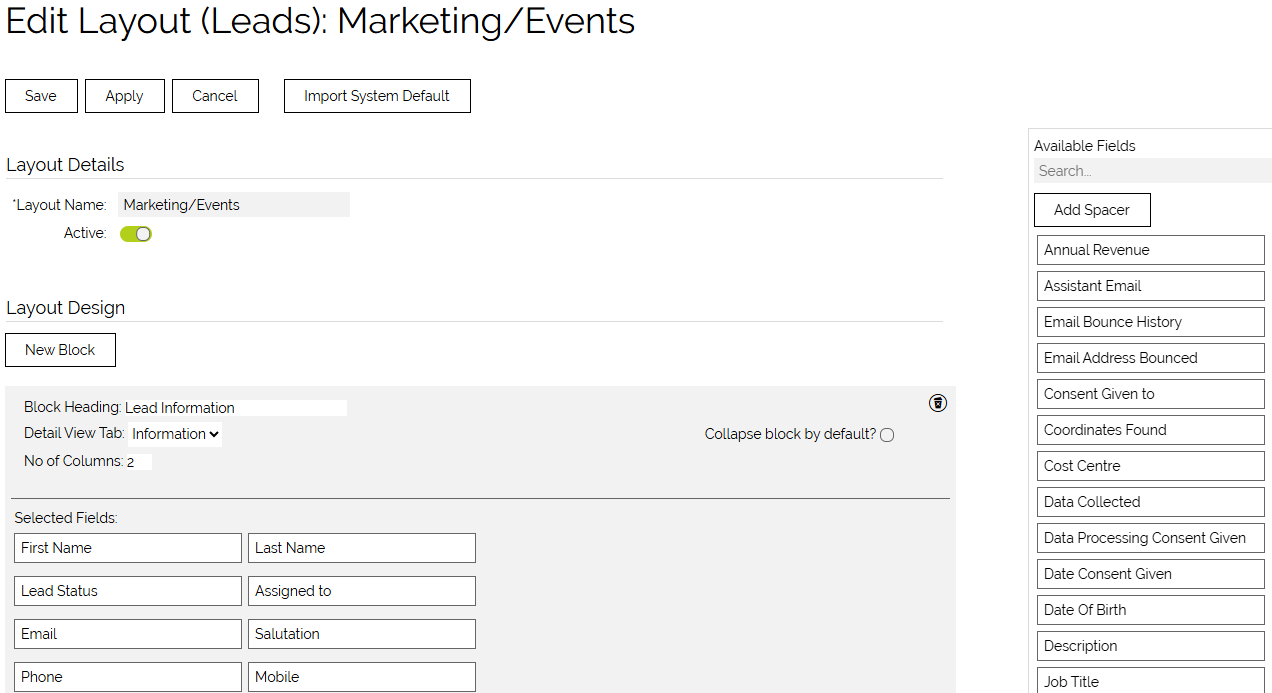
The screen pictured below is an example of a Layout edit screen. There are four distinct areas:
- Layout Details - this is where you set the name of the layout and mark whether it is currently active
- Available Fields - where you search for and select your system fields from
- Layout Design - drag and drop layout designer
- Layout Accessibility - you can set which users or profiles have access to this layout
Permissions
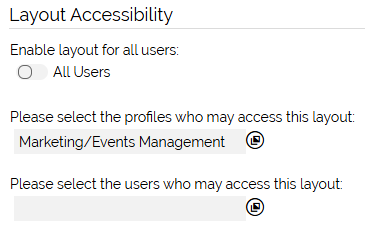
Below the blocks is the visibility for this Layout, you can specify Global/All users, this does exactly what it says and allows everyone in the system to use this Layout. Next, you can specify Profiles that have access to this Layout, and then Users. These options are additive so selecting a profile and some users will mean all users within that profile and the selected users will have access to see this Layout.
You could, alternatively, tick the All users check box as well, this already gives access to everyone making the other selections redundant.
Importing System Default
Before you start building your layout, the first thing to decide is whether you want to create from a blank canvas or simply edit the System Default layout.
Clicking the "Import System Default" button at the top of the screen will rebuild the system default layout on the screen. Then you just have to edit it.
This means you don't have to recreate anything and you aren't likely to forget a field. But you may end up doing a lot of editing if there are a number of fields or blocks you wish to remove.
Adding a Block
Clicking the New Block button will create a new block at the bottom of the page ready to be filled with fields.
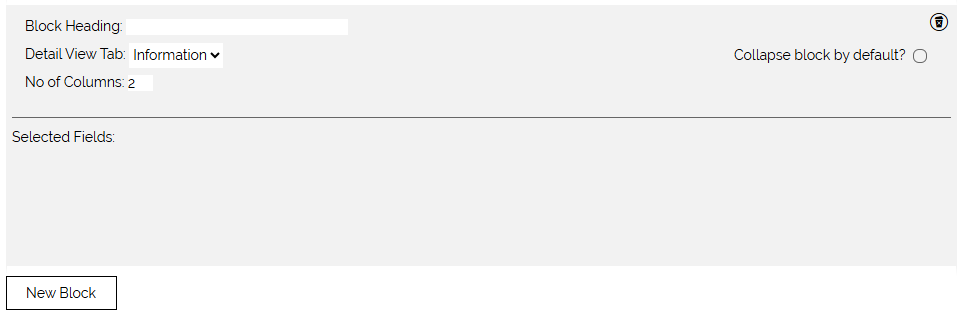
A block is made up of:
- Block Heading - the text that is displayed in the bar across the top of the block.
- Which tab the block will appear on when viewed - Informantion or Details. Note that Activities only have an Information tab.
- The Number of Columns - how many fields are displayed on each line of the Layout.
- Selected Fields - use the drag and drop functionality to drag fields from the list on the right, or from other blocks, into your new block.
- Collapse Block by Default - if information to be hidden until it's needed you can set the block to be collapsed by default when the page loads so to access its information you need to click the block header to open it.
- Copy Address - In modules where you might have two addresses (Contacts, Companies, Quotes etc), any block that contains an address field will display the option to add the Copy Address buttons
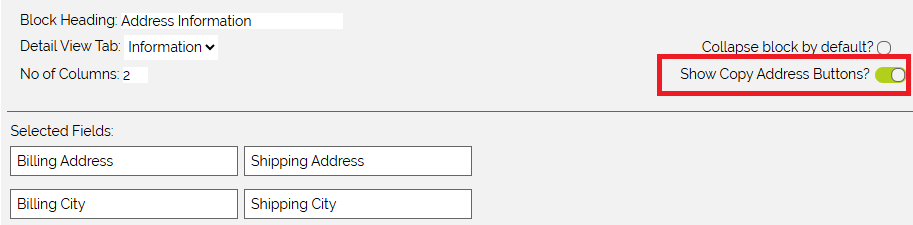
Each block can also be dragged up and down the page to set the display order.
Important: Any fields that are mandatory, must be included in your custom Layouts or else your records will not save!
Moving the Product Grid
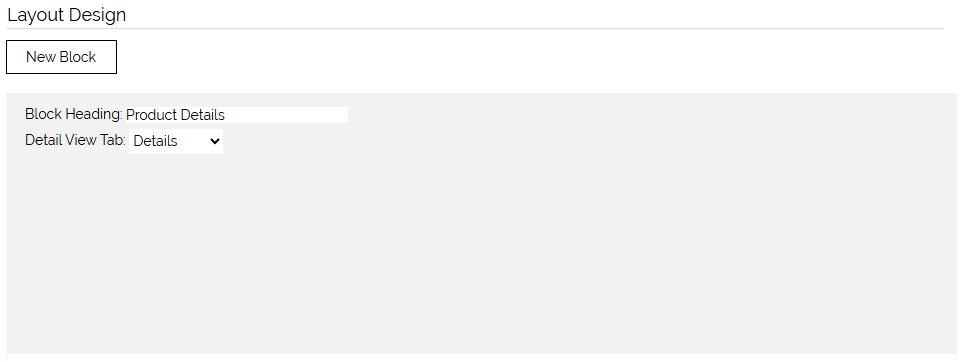
On the modules where you have a Product Grid (Opportunities, Quotes, Sales Orders, Invoices), you have the ability to reposition the Product Grid block anywhere on either the Information or Details tab, simply by dragging the block into position. Note that you cannot add or remove any of the Product Grid fields.
Using Layouts
You can switch between the available layouts by using the selector box which appears at the top right corner of the screen above the record itself

Only the Layouts a User has permission to access will be listed.
Default Layouts
You can set the default Layouts at User or Profile Level.
User Level
Go to The User record (either My Account or Settings > User Management > Users > select the User to edit the Layout for.

Profile Level
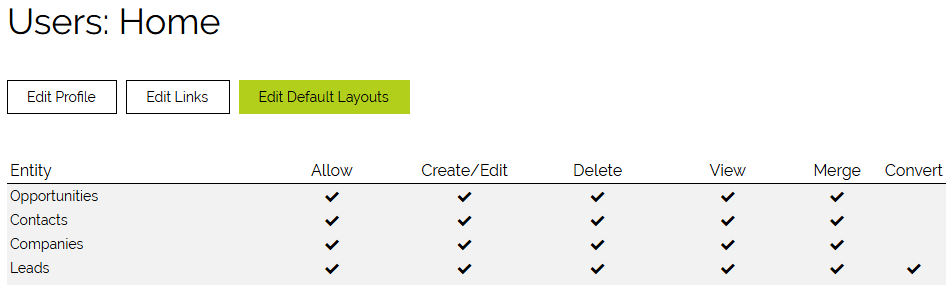
Navigating to Settings > User Management > Profiles and clicking on the name of a Profile (not editing it) will give you this screen.
Setting Default Layout
When you hit either Edit Default Layouts button, you will be able to edit which default Layout a user will see by module. Only modules where you have created a Custom Layout will appear.
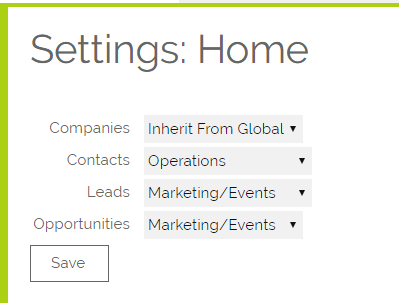
The selectors will default to Inherit from the parent, this means to use the next levels Default setting, So if a User has a Layout set then this will be used, however, if it is set to inherit then a Layout set on the Profile will be used, if this is set to Inherit it will then fall back to the Global setting, if finally this is set to default it will use the default layout created using the screen designer.
Conditional Layouts
Additionally, you are able to set Layout based on Opportunity / Contract Type in those modules.
First of all, you will need to turn on the following settings that can be found in the Settings > Additional Settings > Layout Settings

Secondly, you will need to create the picklist of Opportunity / Contract Types as you would normally edit or create a picklist.
Thirdly you will need to create a Layout and give your Layout the same name as the Opportunity / Contract Type. These must match perfectly.
When you now create an Opportunity or Contract record and set its Type, the new Layout will be automatically saved when you hit Apply or when you Save the record.
Need More Help?
If you have any questions, just start a Live Chat, "Click" on the Chat Icon in the lower right corner to talk with our support team.