ImportantTo use the Click Through Wizard, you will need to make sure your Customer Portal has been enabled. |
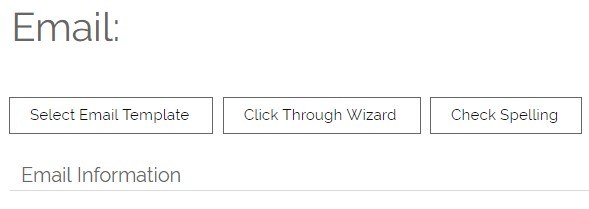
The Click Through Wizard is a tool which you can use to generate the code required to track click throughs in OpenCRM. If the feature is enabled on your system, it will be visible on the Email edit screens and the Email Templates area in Settings.
A click through link will typically look something like this:
http://yourdomain.opencrm.co.uk/portal/index.php?option=com_opencrm_response&task=enquire&page=URLSTARTwww.yourwebsite.com&assign_to=$users_id&subject=email&lid=$leads_record_id&cid=$contacts_record_id&cyid=$account_record_id&campaignid=12345
With the help of the Wizard, you simply need to click on the Click Through Wizard button and follow the on-screen instructions.
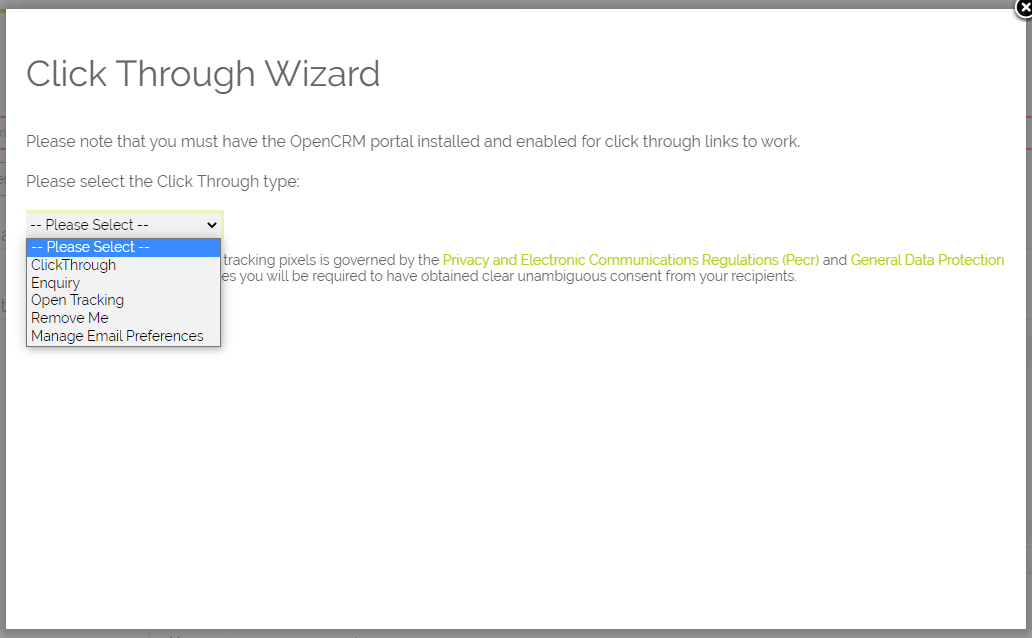
1. Select the click type.
You can choose between Click Through, Enquiry, Open Tracking, Remove Me, and Manage Email Preferences.
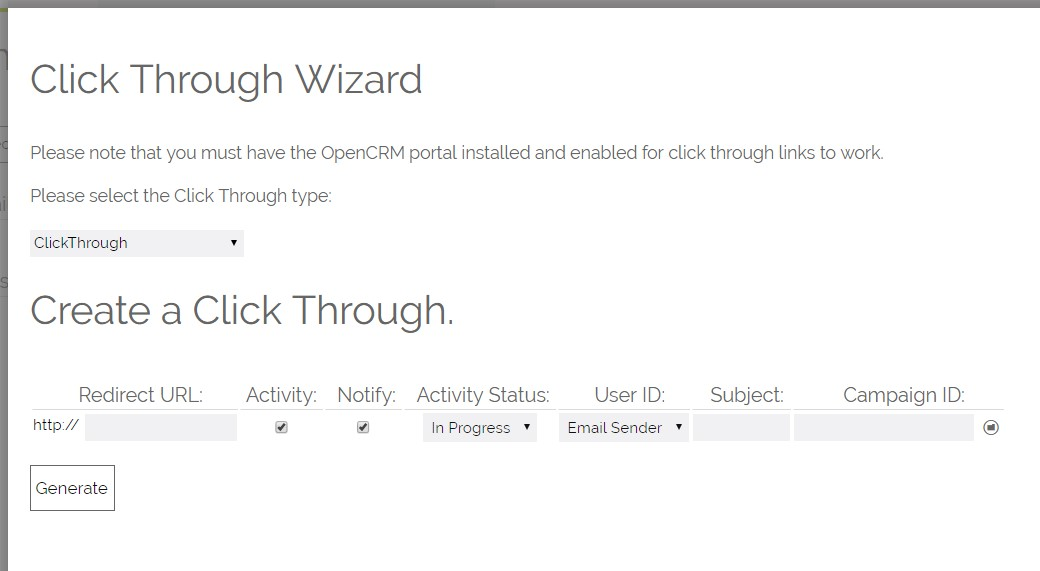
2. Add the various components used to build the click through:
* The link to send people to after clicking
* If you would like an Activity creating to as a result of the Click Through.
* If you would like to be notified when the recipient opens the email (Open Tracking), clicks the link you created (standard Click Through), or makes an Enquiry.
* The status of the new Activity created
* The user to assign Click Through Activities
* The subject for the Click Through Activity, to help you identify which link has been clicked on
* A link back to the Campaign from which you are using the template, to enable you to track statistics at the Campaign level
3. Once you have filled in the details, click Generate to get the Link:
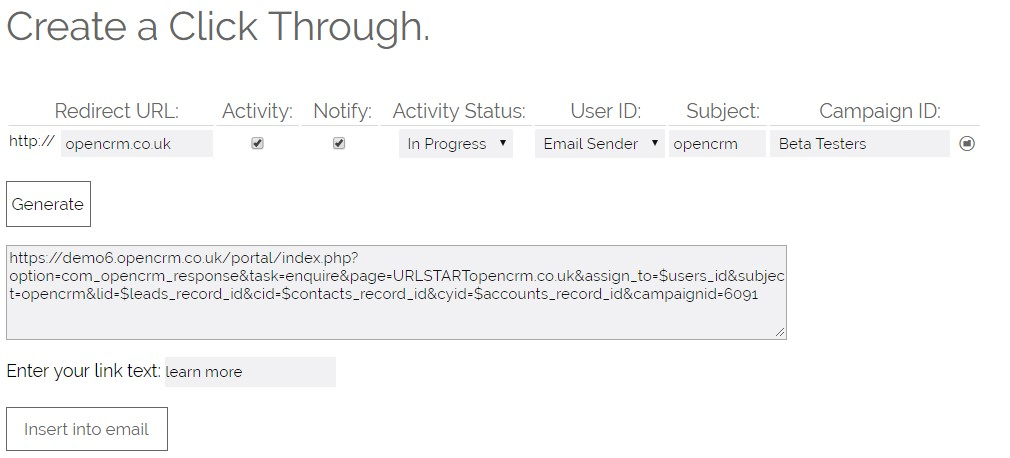
4. Inserting the Link
Once the link has been generated you can copy and paste it to use from any piece of text or image.
For standard Click Through and Enquiry types, you can click the Insert into Email button as shown above. Doing so will close the popup box and drop that link into the email template, you can cut and paste it where you prefer.

You also have the ability to control whether any Click Through type action will generate an activity and/ or a notification in OpenCRM. This is achieved by ticking or unticking the Activity and Notification boxes on the Click Through Wizard.
Both options will be on by default for Click Throughs and Enquiries, and off by default for Opens.
Open Tracking
By inserting a one-pixel transparent image into your email and linking it OpenCRM system we track when (or if) a user opens your email.
Note: The addition of invisible tracking pixels is governed by the Privacy and Electronic Communications Regulations (Pecr) and General Data Protection Regulation (GDPR) in most cases you will be required to have obtained clear unambiguous consent from your recipients.
Because we are inserting a blank 1px image into your email you shouldn't be able to see it in the editor window. To check that it has been added after you have filled in the Open Tracking form, similar to the Click Through process above, click on the down arrow on the right of the editor then click on the Source button. This shows your email as html code. If you scroll down to the bottom of the window you should see an "img" tag or line similar to the screenshot below. 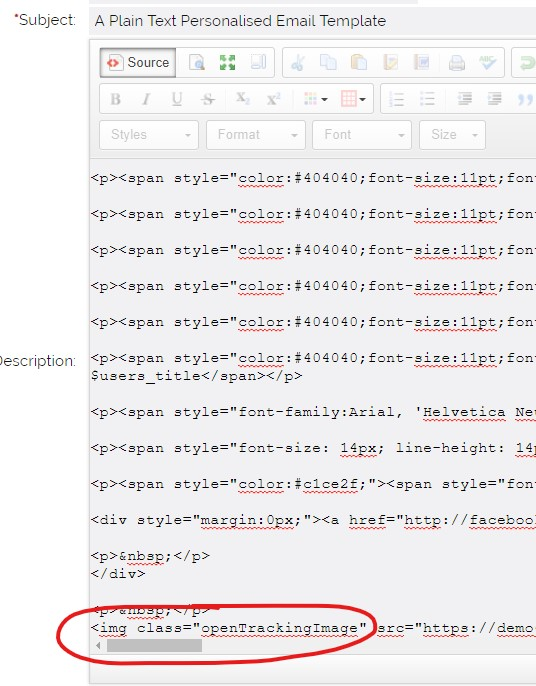
NOTE. Notify may not work if the recipient uses an email client that is set to not download remote content.
Unsubscribes and Subscriptions
You have two options to allow your email recipients who decide they no longer want to receive emails from you. These are both set via the Click Through Wizard.
Unsubscribe - select Remove Me from the list of options. You can choose whether to link the Unsubscribe to a specific Campaign by selecting one from the screen: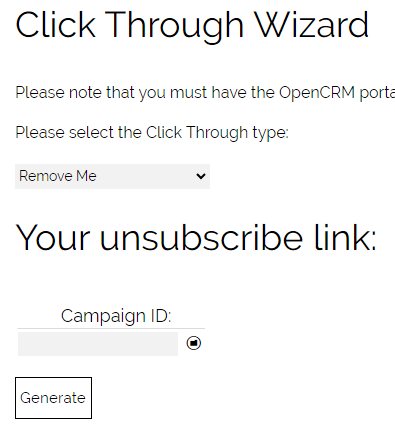
Clicking Generate will create the link, which you can then insert into your email as you do with Click Through links.
If a person unsubscribes, it will tick the Do Not Email field on their record. Once this has happened, if you try and email that person manually, you will see a warning message telling you they have unsubscribed. If you add them to any Campaign, the Do Not Email flag will mean that they will not be included in any email sent from the Campaign.
Subscriptions - This gives your recipients the chance to manage different subscriptions without necessarily having to fully unsubscribe. This is useful if you offer different mailing lists, but also want to ensure you can still email your contacts manually without interference. This FAQ explains how Subscriptions work.
Statistics
When OpenCRM receives a Click Through, Enquiry or Open request we record the request to the relevant Lead, Contact or Company record in the Campaign Statistics block. The fields updated here are Total Enquires, Total Click Throughs and Total Opens.

If the link or open tracking image is linked to a Campaign then we also increase the campaign totals - Click Throughs, Enquiries and Opens fields

By opting to create an Activity when a user clicks on your link or opens the email you will be able to see in the created activity when the user clicked on the link or opened the email and be able to respond directly.
Linking the Primary Company to a Click Through
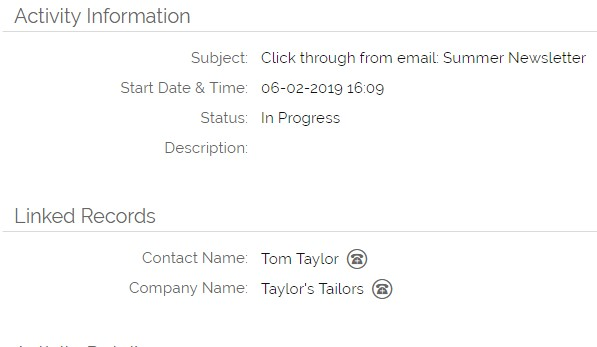
You have the option to link a Contact's primary Company to any Activities generated by a Click Through (this includes the three main types: Open Tracking, Enquiry, and Click Through).
To turn this on, go to Settings->Configuration->Additional Settings and view the Activity block. You will want to turn on the below setting:
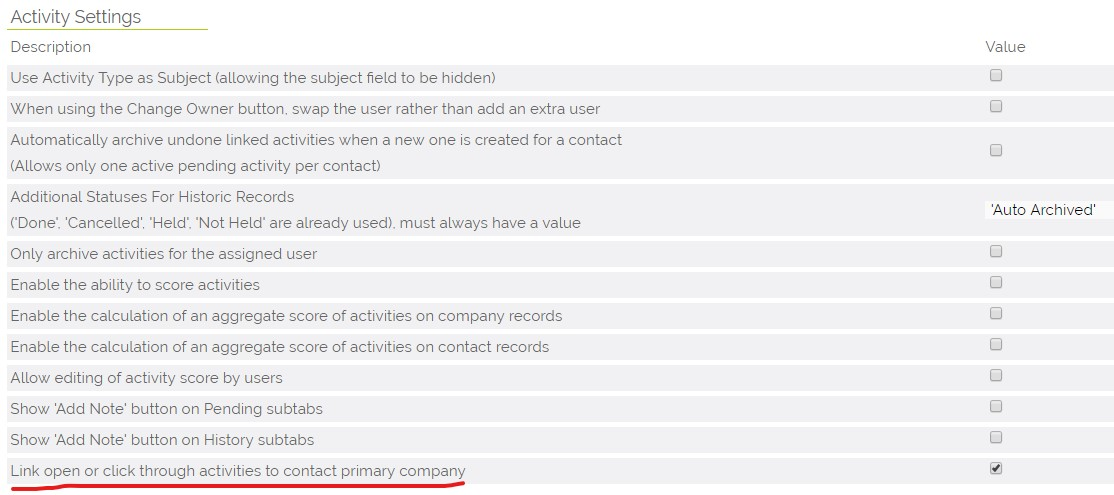
Once turned on, your Click Through Activities will contain a link back to the Company as well as the Contact (under the Linked Records header):
And the activity will be visible in the sub-tabs (Pending/ History) of both Contact and Company records - here is an example of a Click Through being displayed in the Companies pending sub-tab:
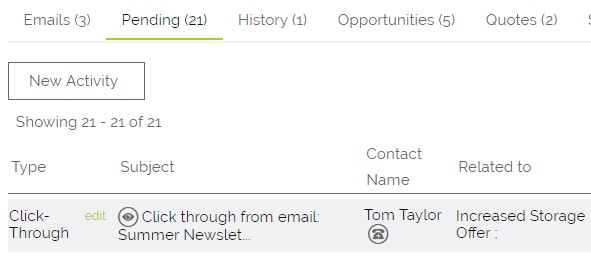
This enables you to report on email Click Throughs at Company level as well as at Contact level.
Adding UTM code to your Clickthrough to enable Google Analytics
Once you have generated your clickthrough link, you can amend it to perform additional tasks. The best practise for this is to paste the link into Notepad, and you can then add to the link without changing the formatting.
Here is an example link with the UTM code inserted at the end of the section of the clickthrough that contains the target link itself:

For details on configuring things from the Google side of things, please refer to this guide: https://support.google.com/analytics/answer/1033863
Need More Help?
If you have any questions, just start a Live Chat, "Click" on the Chat Icon in the lower right corner to talk with our support team.


