

OpenCRM allows administrators to customise PDF templates and set up multiple custom PDF templates for certain parts of the system. These templates can be set up for quotes, sales orders, purchase orders, invoices, helpdesk and project PDFs, and despatch notes.
Some systems may need to enable these custom PDF templates, which a system administrator can do from the "Additional Settings" section of OpenCRM.
The custom template PDFs can be enabled on a PDF-by-PDF basis, so you can turn some of them on and leave the others to be the system defaults. Similarly, they can be turned off at any time, and the system will automatically revert to using the defaults.
This article is going to cover:
- Where to go to edit PDF Templates
- How to create/duplicate a template
- Editing an existing template
- Using merge variables
- Setting up the Product Grid (for sales PDFs)
- Using the Linked Records Grid (for Company or Project Statements)
- Configuring a PDF with no Grid
- Adding an image from a custom image field to a PDF
- Exporting PDF Certificates From Events (for Attendees)
- Adding a list of Attendees to a PDF template
- Producing borderless PDFs
To enable the custom PDF templates, select "Additional Settings" from the configuration section of the settings page and navigate down to "PDF Settings". You will see the following options:
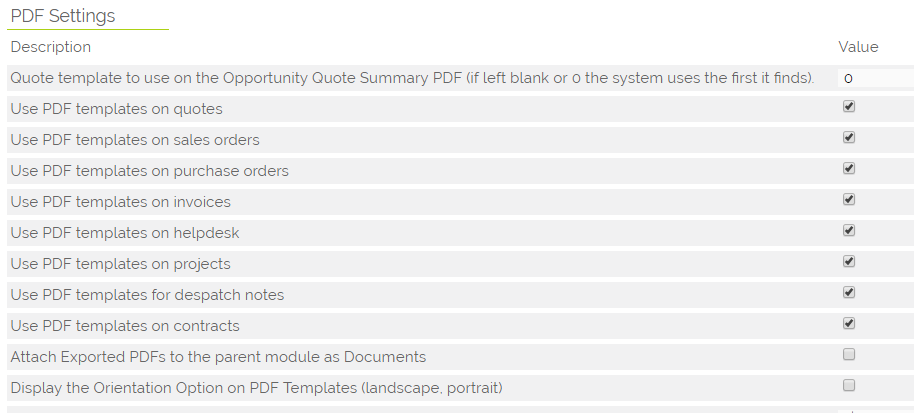
Once you have selected the PDFs you wish to use the custom PDFs for, save the settings and they will be enabled on your system. OpenCRM comes with one default custom template for each of the PDFs, so there will be no point where the system is unable to generate PDFs for the modules when making the switch.
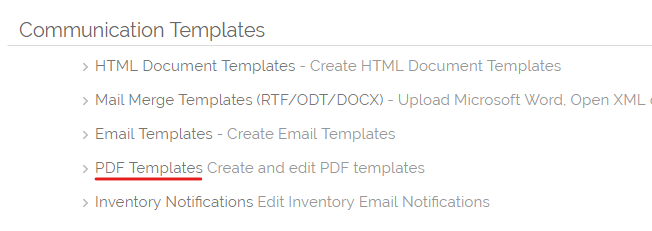
Administrators can edit templates from the settings page in OpenCRM. The option for PDF templates is within the "Communication Templates" section as shown below:
Clicking on the PDF Templates link will give you the following screen:
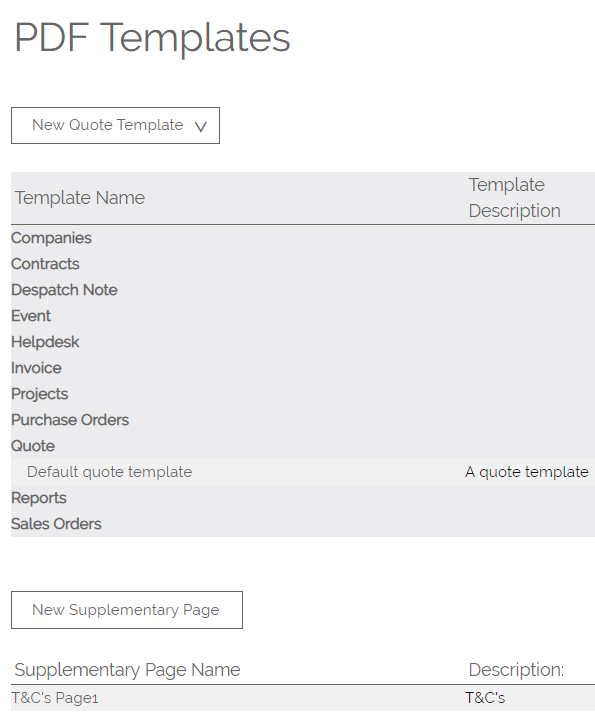
The bold green text, as shown above, is to separate the different template sections so the templates are easy to differentiate. Clicking on one of those will expand it to show all of the templates for that particular section, as shown below.
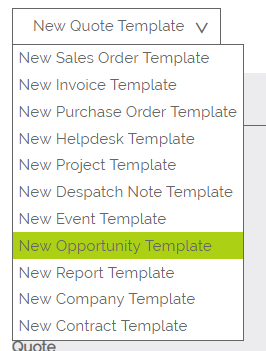
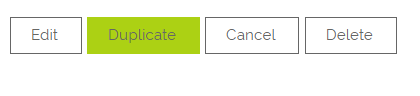
If selecting the template from this option, you will be taken to a screen which will show the outline of the template you are looking at, as well as the options to edit, duplicate or delete the template or to cancel out of the template and return to the template list :
Create New Template
Creating a new template will give you the same screen as editing an existing template, but the name, description, columns, header and footer will be blank:
Duplicate Existing Template (recommended)
If you are looking to create a new template, we typically advise people to duplicate one of the default templates or a template they have already created. This just saves you from having to re-enter information or restyle your template.
PDF templates in OpenCRM can be duplicated to make editing their layouts easier. The duplicate button on the template details screen allows you to duplicate a document.
Once you are on the details screen and you click to duplicate the template, you will be presented with the following screen:
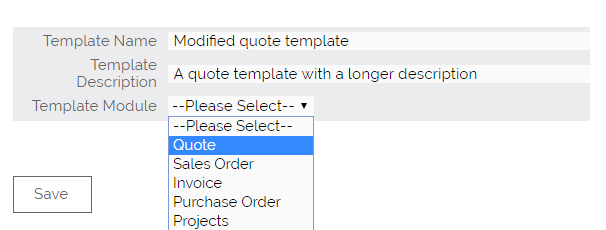
This will allow you to set the template name and description and also select the module you are copying the template to. You can copy a PDF template to any of the other template modules, as this will make the PDF header, footer, columns, and settings the same as on the template you are copying. For templates where these options are not relevant, the fields that don't appear on the template will appear blank.
When you save the duplicate, you will be returned to the list of PDF templates on your system so you can edit the new template or another one of your choosing.
There is no limit to the number of PDF templates that can belong to any section.
Edit Existing Template
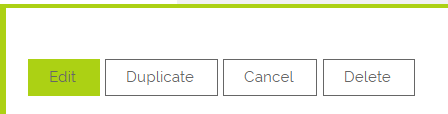
To edit an existing template, you will select a template from the screen above and click on the edit button.
Once there, you will be presented with one of the following two screens, depending on the PDF you are editing - with or without a Product Grid.
A Note on Merge Variables
If you need to add a merge variable to your PDF template, the easiest way to find the correct one is to look for the Merge Fields dropdown menu above the Template Name section.
1. You can select the correct field from the menu.
2. This will output the variable into the field next to it
3. You can now copy it and add it to your PDF template.
It's good to know: When creating Quote, Sales Order, and Invoice PDFs, you can use the merge variables $full_billing_address and $full_shipping_address to merge the relevant address into your PDF.
Product Grid Present
For quotes, purchase orders, sales orders, invoices and despatch notes, you will be shown the following screen:
The first, untitled block with a drop-down is for getting the merge variable for the fields to display on the PDF. Selecting an item from the drop-down will put the merge variable for that particular field in the box next to it for you to copy and paste into the template.
The PDF Template Information lets you set the name and description of the template, which will appear on the PDF template list screen. The template's name is also used if there is more than one template for a particular type, so you can choose which one the system produces.
Template settings allow you to set the format of number fields on the template. This section is specifically for quotes, sales orders, purchase orders, invoices, and despatch notes, as they deal with quantities and currencies. The current options in that section are:
- Decimal places
- Decimal point character
- Thousand separator character
This makes creating templates for international currencies easier.
The PDF header block for quotes, sales orders, purchase orders, despatch notes, and invoices will be displayed above the product grid on the documentation. On helpdesk and project PDFs, this will form the entire PDF template—a screen for the edit view of helpdesk and project PDF templates is shown later.
The PDF columns section, available on the sales documents, allows the selection and naming of the columns appearing from the sales entity. This includes any custom columns set up and configured in the system. This section is drag and drop so that you can move the columns from one box to another, even in which order they will appear on the document. To move the boxes, click and hold the grey border of the box and drag it to where you wish it to appear in the product grid or to the "Available Columns" section if you want to remove it from the PDF. When moving the box, the reposition is shown with the text "Place here?" as shown below.
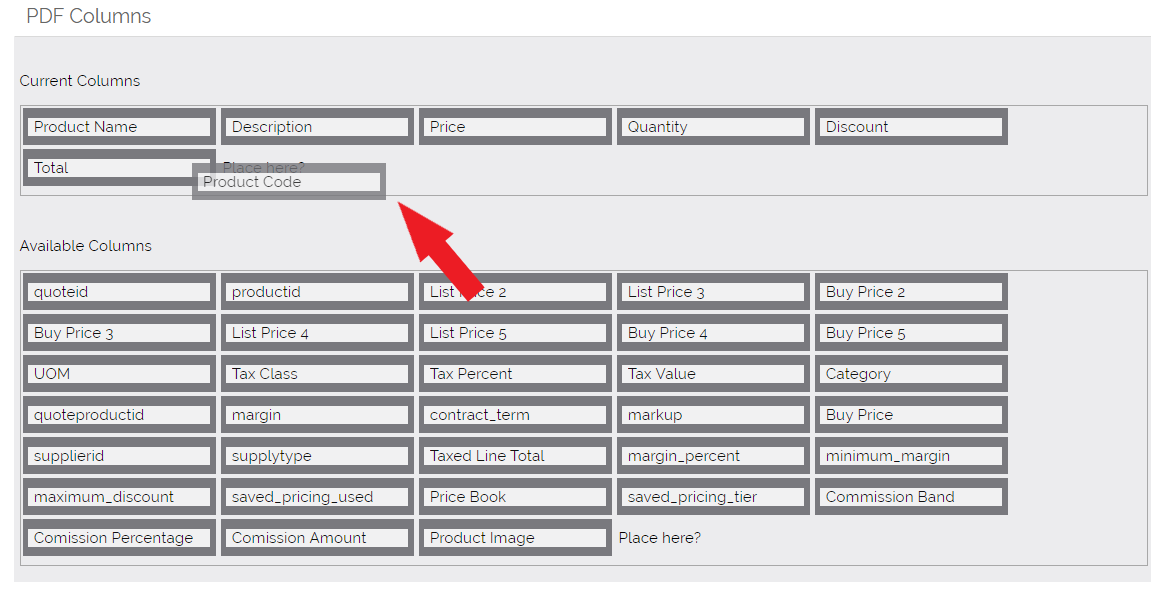
The boxes in the "Current Columns" section can have their labels edited, and the PDF will reflect the change we have made.
This will produce the following grid header when the PDF is produced from OpenCRM:

When the PDF is produced, the "Description" field, if it appears, is given three (3) times the width of the other columns due to the amount of text that is usually contained within that column.
The PDF Footer section allows you to customise what appears after the product grid on the PDF. This section is unavailable on PDF templates without a Product or Linked Record grid.
Linked Record Grids
Similar to the Sales modules, grids of certain linked records can be included in the Companies, Contracts and Projects PDF templates.
- Companies can have a grid of linked Invoices
- Contracts can have grids of linked Activities and Tickets
- Projects can display grids of linked Activities and Tickets
If you do not want to use the linked records grid on a PDF, you can skip to the next section of this article.
To enable the grid on a PDF template:
- In the "Template Settings" on the PDF edit screen, look for the "Show Linked Detail" field
- Select the Activities or Invoice option
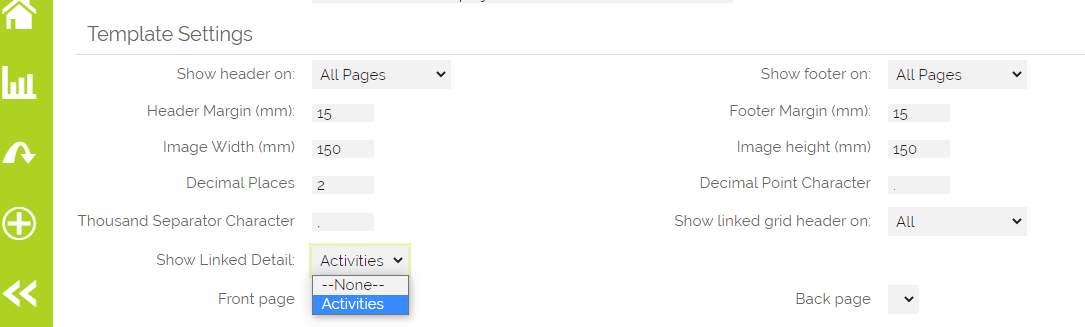
- This will trigger the appearance of several new blocks on the Template Editor.
Setting up and styling your PDF template
- Styling and configuring the Headers/Footers - works the exact same as the sales PDFs, so we won't cover it again here.
- Current/Available Columns - exact same as setting up your Product Grid
- Filtering the Linked records - this is where these PDF Templates are different.
With these Linked Record Grids, you can decide which records appear on the PDF through the use of the Standard and Advanced Filters:
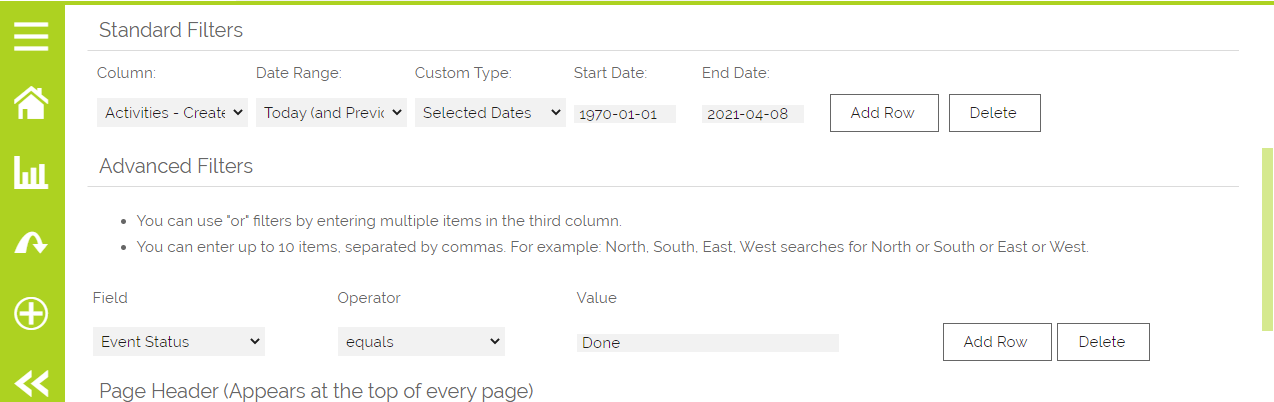
As you can see, these work the same as those on Reports and Custom Views.
- Standard: filter against a date field
- In the example above, only Activities linked to a Project with a created date before "today" will be included.
- Advanced: filter against other fields
- The example will only show completed Activities, but you could only show those with a Charge Time of "Chargeable" or where the Type doesn't equal "Call."
If required, you can have multiple grids and specify different filters, columns and headers for each.
PDFs with No Grid
If you are editing a HelpDesk or Event PDF, then the screen you will see when you are editing will look like the following:
Add images to PDFs from a custom image field on your Quote, Sales Order, Invoice, etc.
If you'd like to add an image to your PDF template from a field on your Quote, Sales Order, etc., you can do this very easily. But be aware that the image will be rendered in the size it has been uploaded, so you should size it before uploading.
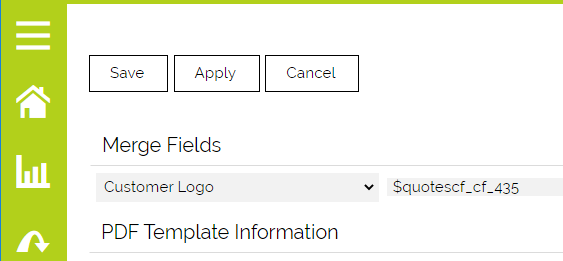
Once you've added your custom image field, go to your PDF template and add the merge variable for the field where you want the image to go.
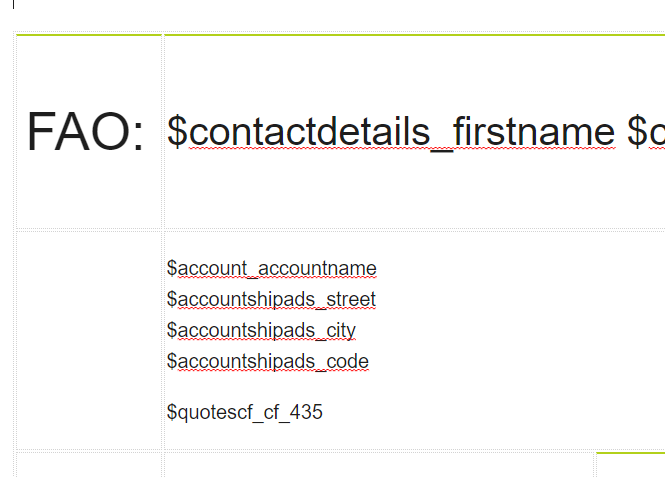
The easiest way to get the merge variable is by using the field selector dropdown option on the PDF template editor.
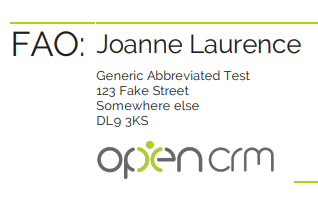
Then, when you export, you get something like this:
Styling an Image Custom Field
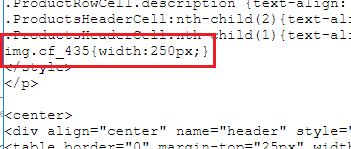
If you need to adjust the styling of an image from a custom field, for example, to add a border or sizing, you will need to do this in the template's stylesheet, which is usually found in the PDF Header.
You will simply add "img" then ".cf_##" followed by the styling you want to add. So for example:
Exporting PDF Certificates From Events (for Attendees)
This feature allows PDF documents to be created in bulk for all attendees of an event - for example, to produce an event certificate.
Using standard merge variables, details from both the event and individual attendees (Contacts) can be merged into the PDF.
It is also possible to email all attendees their merged PDF in bulk or email or download all of the generated PDFs to a single recipient.
A button has been added to the attendee sub-tab on events:
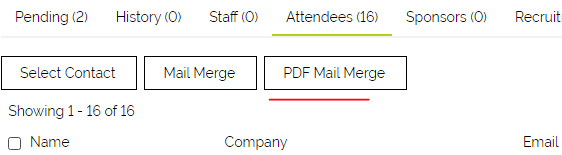
Select the attendees you wish to generate a PDF for by ticking the tickbox to the left of their name, then click the PDF Mail Merge button.
When you click this, if you have multiple Event PDF templates, you will be asked to choose which template you wish to use, if you only have one event pdf template, the merge will start immediately.
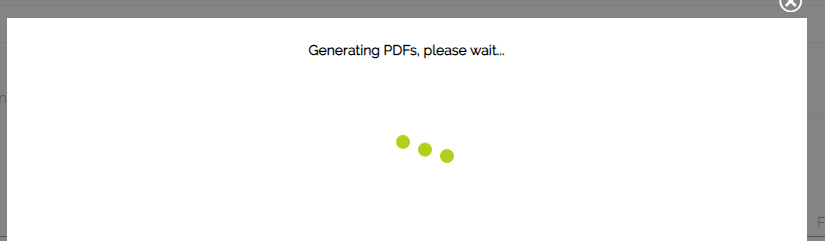
After selecting your event template, or if you only have one template, the following screen will display whilst the PDFs are generated:
And then the results screen appears:
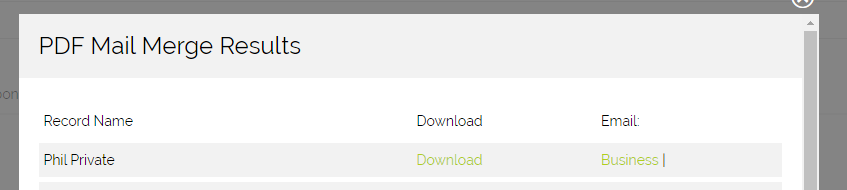
From here, for each attendee record, you can individually download or email their PDF by clicking the link under the appropriate column. Under the Email column, if this attendee has multiple email addresses, you'll be offered the choice of which address you want to send to - there will be a separate link for each email address - Business (Office email), Private and Company (the contacts primary linked Company email address)
Downloading at least one of the PDFs and checking the output before bulk sending is recommended.
At the bottom of the page are the bulk action buttons.

Email All Attendees (Business/Private/Company)
This option allows you to send the generated PDF to all attendees using the email address denoted by the button you choose. Each attendee will receive an individual email with their personalised PDF attached. When you click any of these buttons, the following screen is displayed, which allows you to create the email to send and also link any other attachments you want to send along with the personalised PDF:
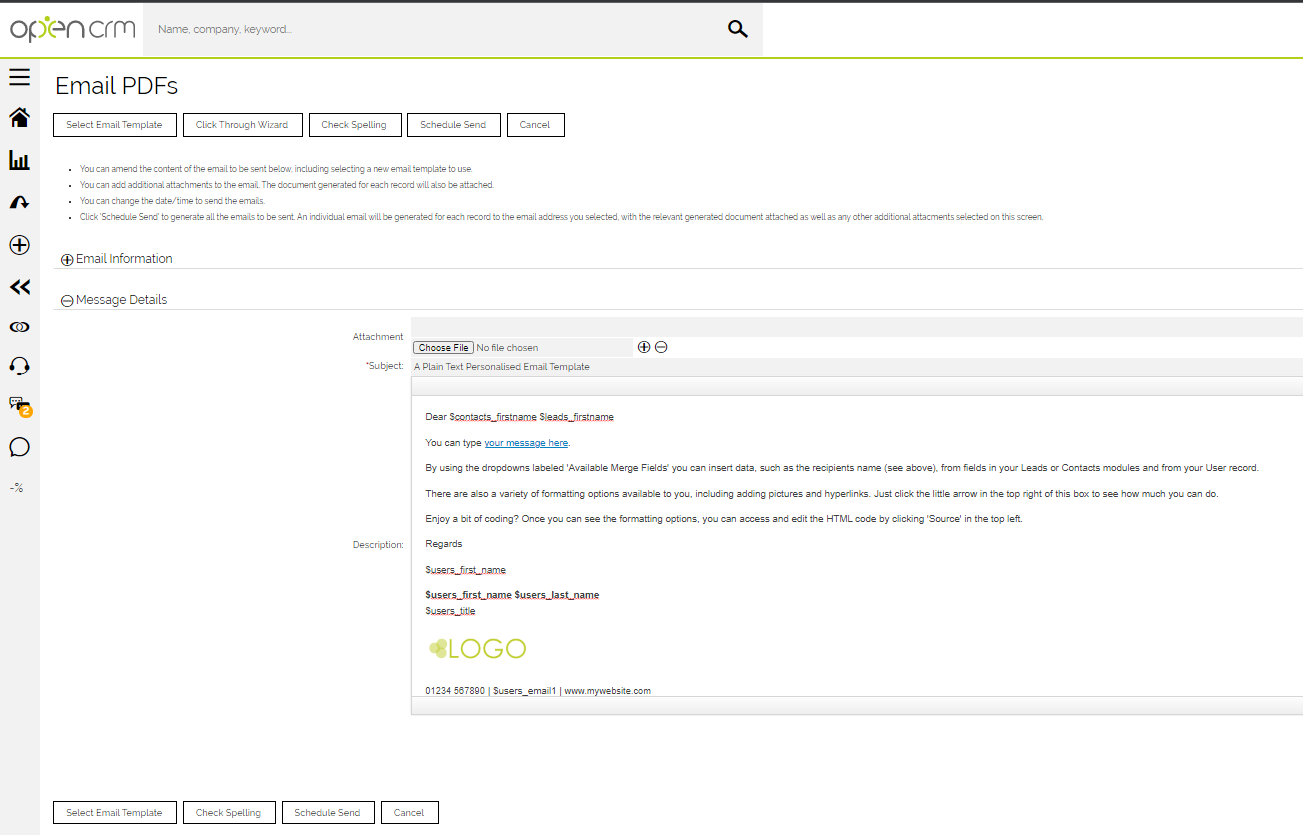
As you can see, this is very similar to a normal email screen. You can choose a template, change the subject, add additional attachments, and even use the click-through wizard to add click-through links.
Expanding the Email Information header allows you to choose the time at which you want to send the generated emails.
Once you click Schedule Send, an individual email is generated for each attendee. The email scheduler will automatically send this email at the time specified in the sending date and time field. If you are generating a large number of emails, be sure to check that you are happy with what will be sent before proceeding.
Normal bulk mail restrictions will apply here. The system will prevent you from sending to more recipients than your current mail quotas allow.
Email All PDFs / Download All PDFS
Downloading all PDFS will produce a single zipped file containing all the generated PDFs and prompt you to download this file.
Email All PDFs will generate an email with all the individual PDFs linked so you can send it to a single recipient (or multiple recipients) of your choice.
By default a PDF has a border of padding around the content. It is possible to enable a PDF to fill the full page content (including using an image as a background to, for example, put a border around the whole page) as follows.
Events Attendee List
You can use PDF templates on Events to generate a list of attendees, for example, to produce a register for the event.
To insert an attendee list in your Event PDF, use this merge variable: $attendee_list
Your list of attendees will be inserted into an HTML table, and you can style the table and contents using the following CSS classes:
.attendeeListTable
.attendeeListHeaderRow
.attendeeListHeaderCell
.attendeeListDataRow
.attendeeListDataCell
Two additional settings are available in Event PDF templates, allowing you to specify which Attendee statuses should be included and the fields from the Contacts you want to include. Please note that the fields to include are only editable by OpenCRM. Please get in touch with our support team if you wish to change these.
The attendee list will be compiled when the PDF is generated. If it has been set via an Email Plan, the list will be accurate at the time the email is sent rather than when the Email Plan was triggered. This ensures your attendee list is up-to-date.

Borderless PDF
To get the content of a PDF to fill the full page (no border padding)
1. Turn on the "Borderless" option under "Advanced settings" in the PDF template editor
2. To get the PDF content to fill right to the edges of the page, the following additional style definitions are needed on the body tag to remove some default padding on the body tag.
body
{
margin-top:0px;
margin-bottom:0px;
margin-right:0px;
margin-left:0px;
padding-top:0px;
padding-bottom:0px;
padding-right:0px;
padding-left:0px;
}
3. Enable and set the container div to be: 1456 x 1038 under "Advanced Settings" in the PDF template editor
OR
3b. You could turn the container div off and add your own, e.g. the following HTML will put a 50px border around the content
Borderless with image background
To create a PDF with an image background that fills the whole page (e.g. to put a graphical border around the content)
Before starting - your background image will need to be approx: 1040px x 1450px.
1. Upload the image using the editor add/upload image feature
2. Cancel out of the dialogue to insert the image into the template (so you've uploaded the file but not inserted it).
3. Copy the text for the image location.
4. Add the following style tag to the HTML source of the first HTML block on the template editor (needs the full path to the image, including the system name to work):
body
{
background-image: url("https://systemname.opencrm.co.uk//test/upload/image/pdfbkgr(1).png");
}
Need More Help?
If you have any questions, just start a Live Chat, "Click" on the Chat Icon in the lower right corner to talk with our support team.