A context-sensitive field is a drop-down list which can have different values depending on which value is selected in a different "controlling" drop-down list.
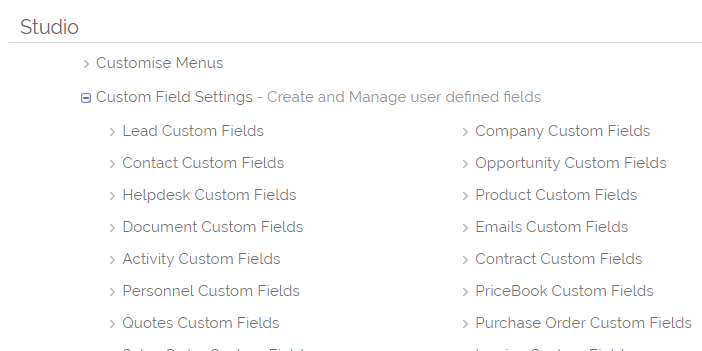
These are available to set up on OpenCRM as custom fields from the settings menu, in the same way, that you would normally add custom fields; Navigate to the settings page and, under the Studio area of settings, click on Custom Field Settings. From there you need to select a module which you wish to see custom fields for and add custom fields to.
Once you have selected that, you will be taken to a screen which shows a list of the custom fields for that module, and a button to add a new one. Clicking on the "New Custom Field" button will take you to the screen where you can set up fields for a module.
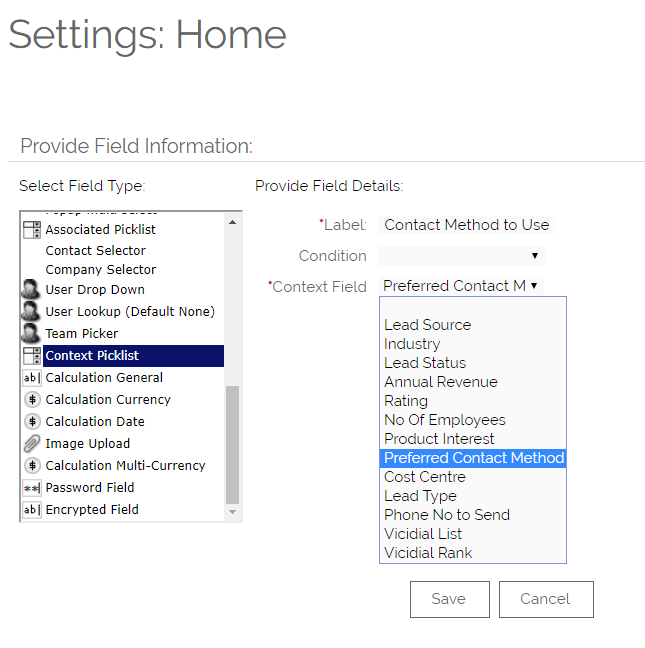
Within the list of Field Types at the left of the next screen, there is a type of "Context Picklist".
When you select the Context Picklist you are given the input areas shown above. Label and Condition appear for every custom field when setting up, and the "Context Field" is unique to the Context Picklist type. The "Context Field" is the drop down on a screen which controls what will be shown in the field you are creating. The dropdown will show all other drop-down fields which appear on the screen. This will include other Context Picklists, so you can chain them together if you need to.
Once you have set the label and the context field, you need to click Save to be taken to the screen to set up what will appear in the new drop-down when different values are selected.
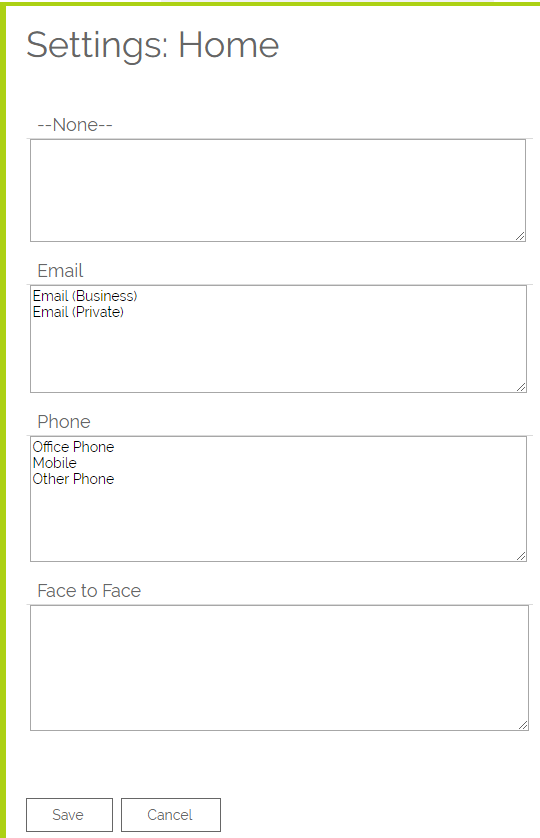
The context-sensitive lookup set-up screen will list all of the values in the controlling field and give a text area to add the values which will show when the relevant value is selected in the controller. Adding values to these is the same as any drop-down edited or created in OpenCRM; each value must be on its own line.
Once this is saved, the context field will be available on the relevant module for you to use.
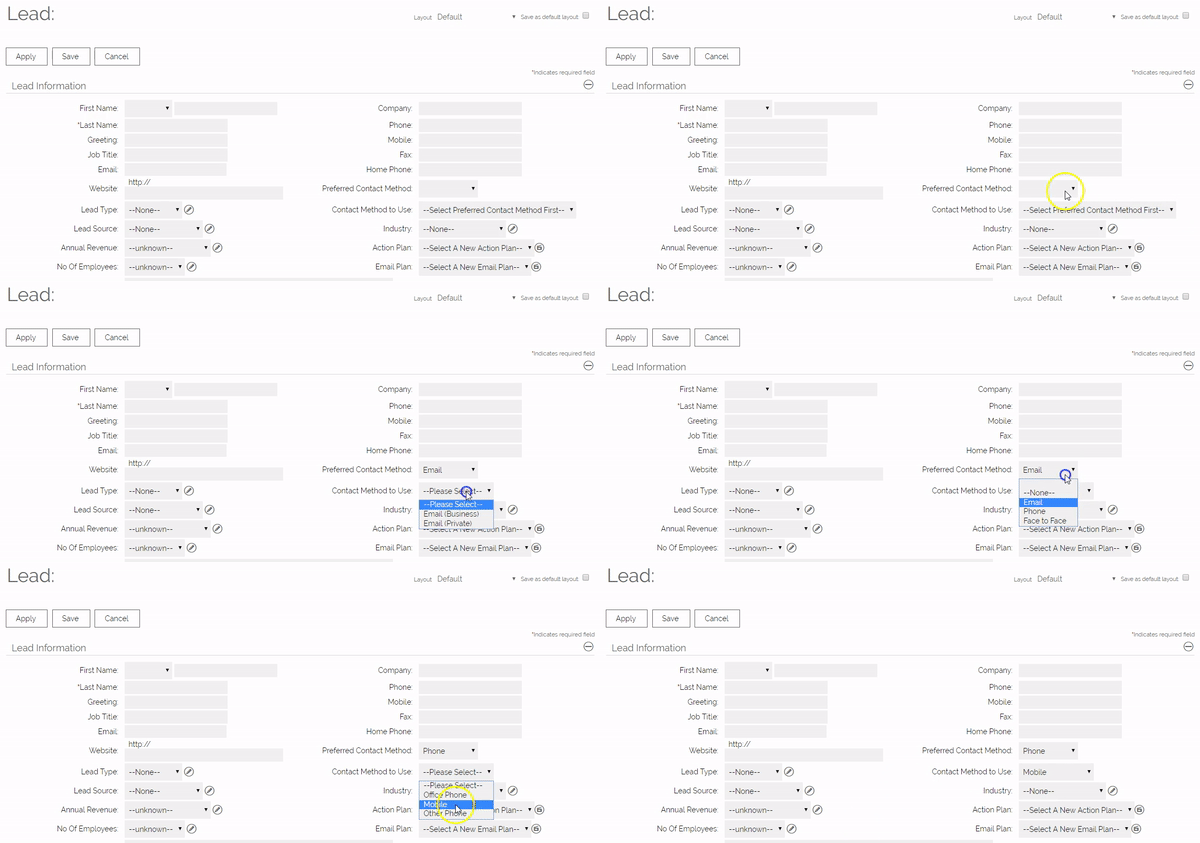
As is shown below, when you first click your newly created field, nothing happens. After you select the context field (in this example "Contact Method To Use"), you can select one of the options you have created in the drop-down menu, in this example for Preferred Contact Method.
If a value is selected on the driving field, then the values which were set up to display for that value will appear in the context-sensitive dropdown.
In this example, where we have chosen the preferred contact method of Email, the values we set up to display when this is selected are shown in our new field. If we then change that to be Phone, the values in the box will change, as shown below:
Need More Help?
If you have any questions, just start a Live Chat, "Click" on the Chat Icon in the lower right corner to talk with our support team.


