What is Workflow? What can I do with it?
A Workflow is a pre-defined series of actions that are triggered by a specific condition. They can include the creation of Activities or other records, the addition or removal of a Warning, and updating linked records when another record changes or is viewed.
Important:
You will need administrative and/or configuration access to setup a Workflow.
Also, you cannot use Bulk Update to trigger the workflow.
Creating a Workflow
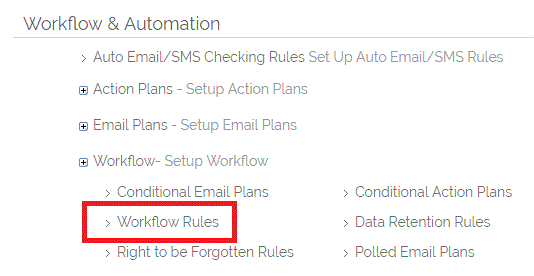
- Go to Settings->Workflow & Automation->Workflow
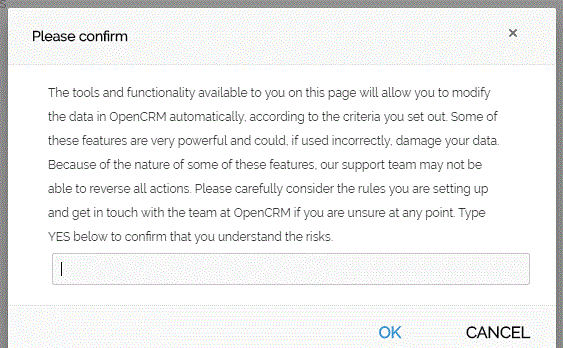
- Click Workflow Rules. You'll see the following disclaimer screen which alerts you to the fact that you are configuring an action that has the potential to affect your data. Type YES and then hit OK.
- You now have the option to select NEW to create some new Workflow or click the Edit linkon any existing Workflow rules that are configured. Clicking on New will present a screen that looks like this.
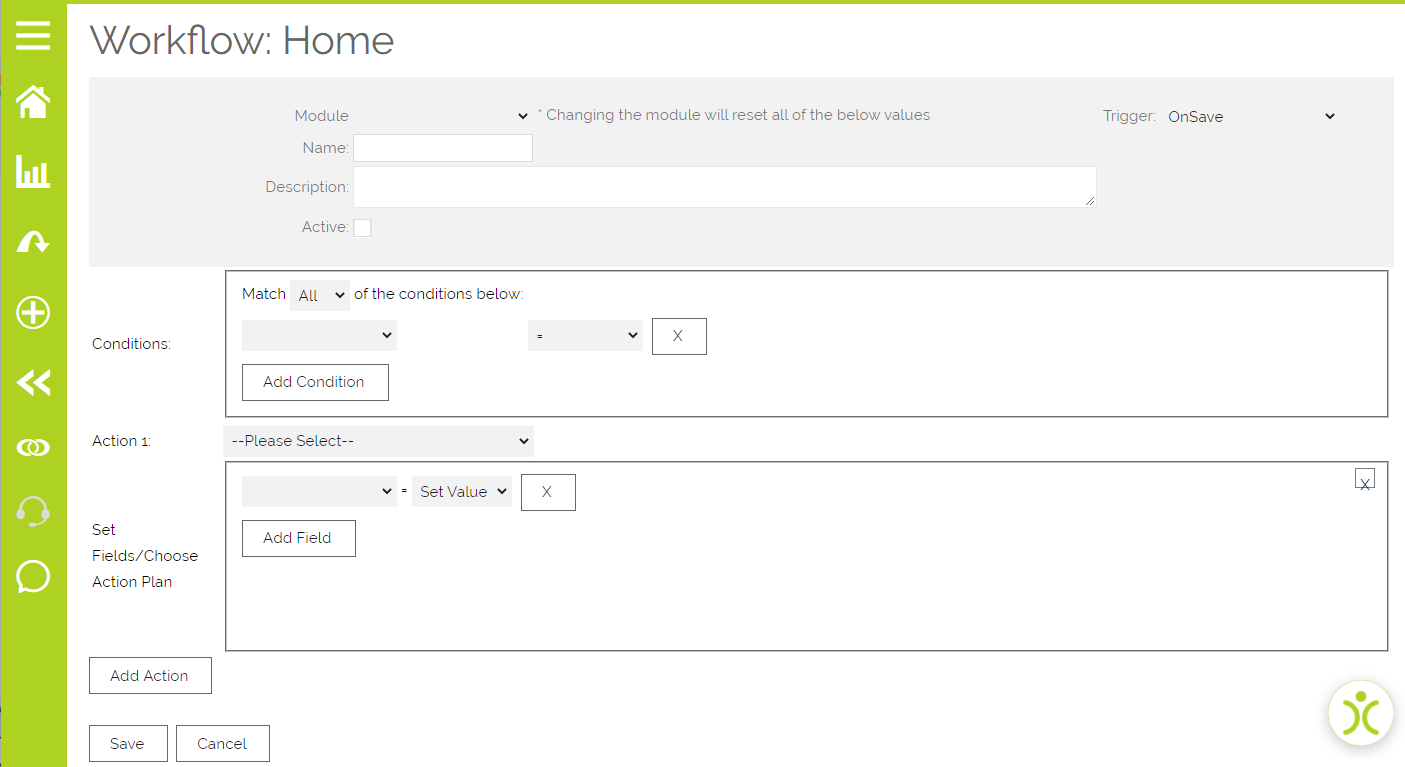
- Give your Workflow a name and description, then select the module that will trigger the change. In this example, I've selected Contacts because I want to trigger a Warning message to appear when the Do Not Email button is ticked.
- I've set the trigger as "On Save" because I want this to happen when someone changes the Contact record manually. There are several options, however, for the trigger:
"OnEdit" will trigger the Workflow when someone goes into the Edit screen of a record that matches the conditions. "OnConsult" will trigger the Workflow when someone views in the Consult screen of a record matching the conditions.
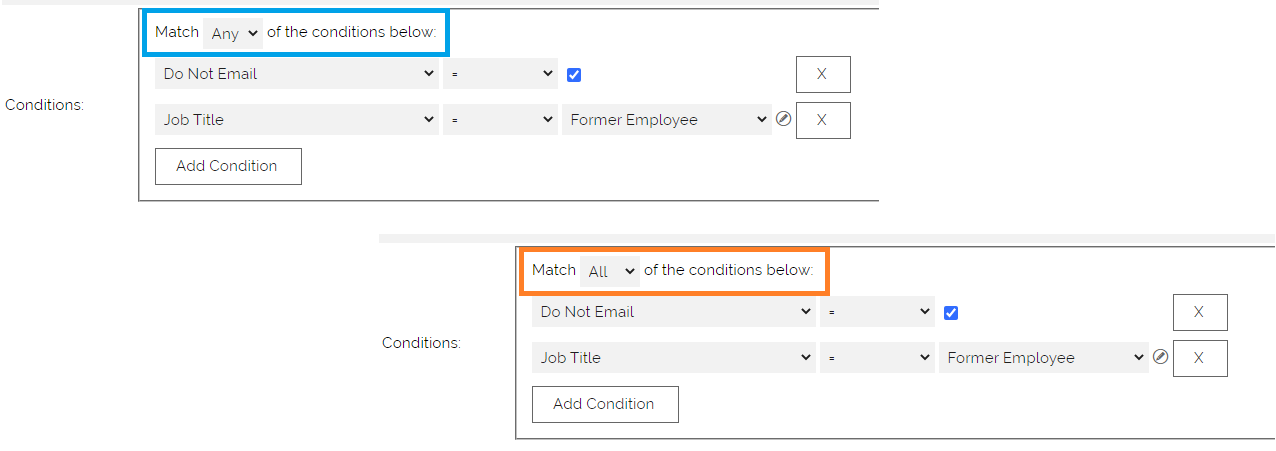
- Next you will want to set your conditions. You have two options here before you even start picking which conditions you want to target:
- Match ANY of the conditions - Think of this as an "or" option. So in the example below, your workflow will be run against Contacts who have Do not Email ticked OR those with the job title "Former Employee" OR both
- Match ALL of the conditions - This is the "and" option. It will only run if a Contact has both Do Not Email ticked AND the job title "Former Employee"
- New Records - A condition (or set of conditions) that matches a new record will cause the workflow to trigger. This includes "Changed" field conditions. So you could use a field "Changed" condition to always trigger a workflow rule on new record creation.
- Existing Records - A condition (or set of conditions) that matches an existing record will only trigger once all the conditions are met and will not trigger again unless the record is changed (and saved) such that the conditions no longer are met, and then is changed/saved again so that the conditions match again. (i.e. repeated saves of a record without making any changes won't continue to trigger workflow even if all the conditions still match)
Conditions Notes = Value in the field is an exact match to the condition specified (case insensitive) <= Value in the field is less or equal to the condition specified >= Value in the field is greater or equal to the condition specified != Value in the field does NOT equal the condition specified Begins With Value in the field begins with the value specified in the condition Ends With Value in the field ends with the value specified in the condition Contains Value in the field contains the value specified in the condition Changed Value in the field has changed (or this is a new record)
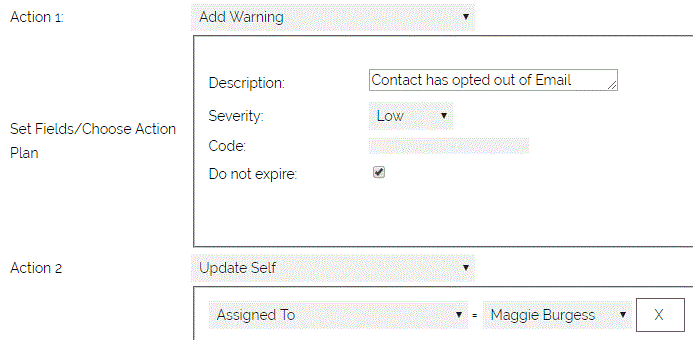
- Once you have set your Condition(s), you will need to set up the Action(s). These are the changes that will take place when a record meets the triggered Condition(s). In this example, I am going to add a Warning to the Contact record and reassign the Contact to our Telesales manager Maggie.
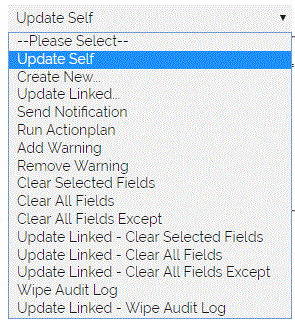
You have numerous options for these actions:
Date fields give you the option of scheduling records for a set number of days, weeks, months, or years for a date before or after the date the record triggers the Workflow. You can use Dates as a trigger in Workflow, using the operator Equals, Before or After X number of Days. You can also simply use "Changed", "Is Empty" or "Is Not Empty" as a trigger, which means you can set off a Workflow whenever a Date has changed. This FAQ explains these functions in more detail.- Update Self - This will make an amendment to the record that triggered the Workflow
- Create New - This will create a new record in a module of your choosing. If you would like it to link to the triggering record you must select the box. Any mandatory field in the module will be added to the action, you must fill in these fields.
- Update Linked - This will update all records in the chosen module that are linked to the triggering record. (i.e. all Activities will be marked as Done)
- Send Notification - This will send a notification to the chosen User
- Run Actionplan - If you already have an Action Plan set up, you may choose to use this. (What is an Action Plan?)
- Add Warning - This will add a warning to the triggering record, make sure you give it a code or you will not be able to remove the Warning using Workflow.
- Remove Warning - If you know the code of the warning, you can also remove a warning from the triggering record using Workflow. This will only work with Warnings that have been added using Workflow as this will be where you define the code.
- Clear/ Update/ Wipe - these further options are designed to help you manage your data retention. For more information on these tools please see this FAQ.
If you would like to link to a secondary existing record, just select the field and start typing. You will be given a series of options to choose from where any matches are found:All picklists should be populated in the Workflow window, if one is not populated, please contact support.
- When you have finished with your Workflow, simply click Save.
If, at any time, you need to alter or update your Workflow simply go to Settings->Workflow & Automation->Workflow and click the Edit link next to the Workflow you would like to change. You can also delete Workflows in this window by clicking the "X".
Copying information from one module to another
You can use workflow to inherit information that could not otherwise be mapped from one module to another.
An example of this would be copying the Assigned to from a Company record onto linked Projects.
Important: You can only copy data from the originating record, not another dependent record.
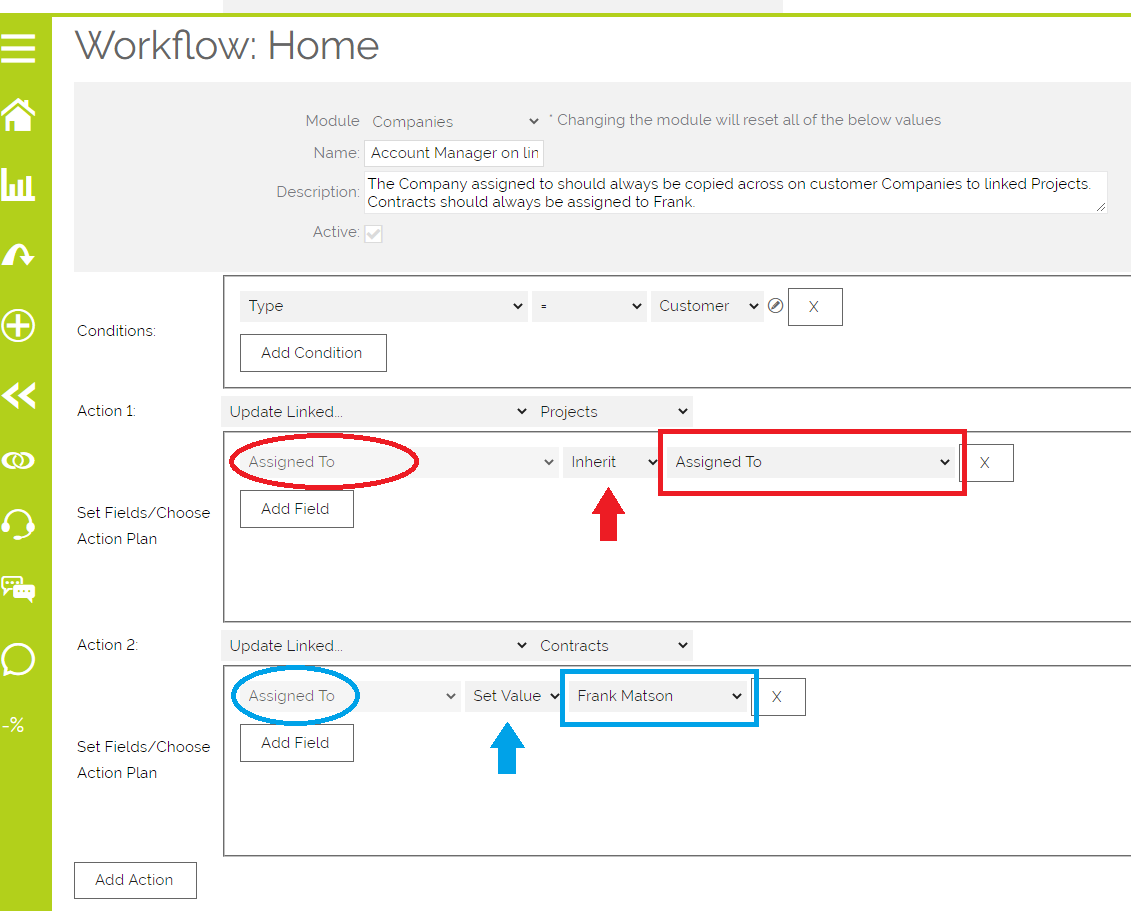
In the example below, the workflow is set up to copy the Assigned to from the Company onto all linked Projects, while setting the Assigned to on linked Contracts to a particular user.
The first action (highlighted in red) shows:
- Circle: the field being populated on the linked Project
- Arrow: which action I want to take, for this linked Project I have selected Inherit
- Once you select inherit, you'll be able to choose a field from the originating record.
- It does not have to be the same field (i.e. Assigned to).
- Rectangle: the field being copied from the originating record (which is a Company with type = Customer in this case)
The second action (highlighted in blue) shows the same:
- Circle: the field being populated on the linked Contract
- Arrow: the action I want to take, in this case I want a set value on ALL linked Contracts, regardless of who the Company is assigned to
- When I select "Set Value" this pulls the information from the module being updated, not the originating module
- Rectangle: my selected value
You can also run Workflow on Companies, Contacts and Opportunities that are created if a Lead is converted.
Triggering a Webhook
Setting up a webhook will require some technical knowledge of the service you want to integrate with.
When configuring a Workflow the Webhook option will be available in the Action picklist.
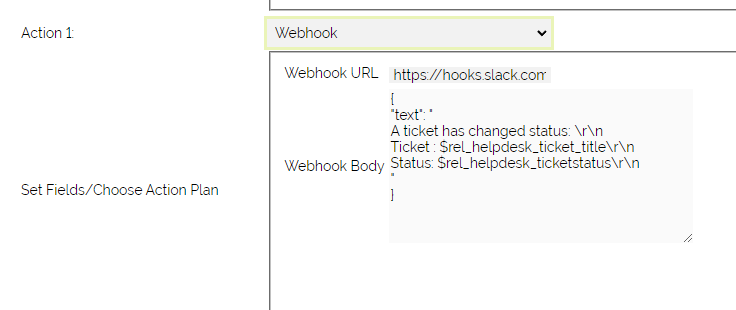
When Webhook is chosen two pieces of information are required:
- The webhook URL
- The webhook body or payload
Webhook URL
The URL will need to be obtained or generated from the 3rd party service/tool you want to integrate with.
For example, if you wanted to integrate with Slack, you would need to create a "Slack App" and enable incoming webhooks within Slack.
You can read more about creating a Slack App here:
- https://api.slack.com/messaging/webhooks
- https://support.knowledgeowl.com/help/using-webhooks-with-slack
Once you have your webhook URL you can enter this in your workflow action in OpenCRM.
A Slack webhook URL will look something like this: https://hooks.slack.com/services/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
Webhook Payload
Next you will need to create a payload, that is the correctly formatted information you want to send from OpenCRM to the 3rd party service. Each 3rd party will have their own required format so check the documentation they provide. OpenCRM will not attempt to validate your payload so it is important to refer to your 3rd party documentation and seek advice as needed.
Slack requires a JSON payload, but OpenCRM permits any format, you just need to ensure it is valid for the service you want to integrate with.
A JSON payload would be formatted like this:
{
"text": "Your webhook content goes here. "
}
You can test your JSON is valid here: https://jsonlint.com/
To insert a line break in JSON use "\r\n"
Here's an example which when triggered from a HelpDesk workflow will send a JSON payload containing the ticket subject, status and a link to the ticket:
{
"text": "
A ticket status has been updated\r\n
Ticket : $rel_helpdesk_ticket_title\r\n
Status: $rel_helpdesk_ticketstatus\r\n
URL: https://asystem.opencrm.co.uk/index.php?module=HelpDesk&record=$rel_helpdesk_id&action=DetailView\r\n
"
}
A complete workflow may look something like this:

|
Need More Help?
If you have any questions, just start a Live Chat, "Click" on the Chat Icon in the lower right corner to talk with our support team.


